WhatsApp requires a Facebook Business Manager ID as part of the application process for a WhatsApp Business Account. Without a valid Facebook Business Manager ID, WhatsApp will not approve your Business Account application.
Why do I need a Facebook Business Manager ID when I apply for a WhatsApp Business Platform Account?
WhatsApp requires a Facebook Business Manager ID as part of the application process for a WhatsApp Business Account. Without a valid Facebook Business Manager ID, WhatsApp will not approve your Business Account application.
Facebook Business Manager ID is a 16-digit number that uniquely identifies your business with Facebook.
How to find your Facebook Business Manager ID:
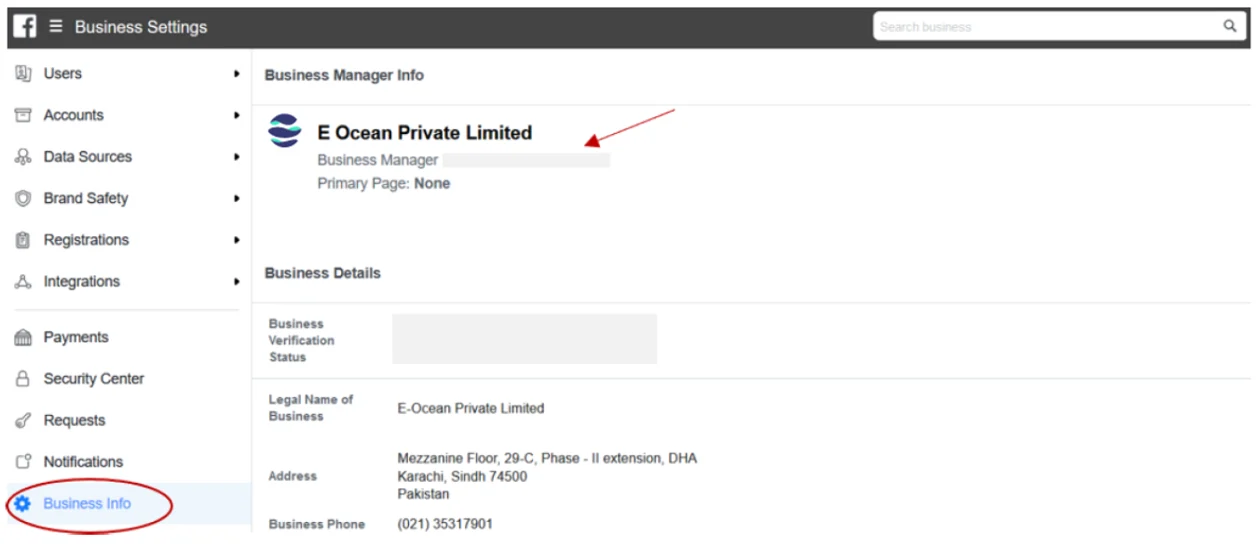
- Log into your Facebook Business Manager account
- Go to Business Settings
- Click Business Info
- Below Business Manager info, you will see your Facebook Business Manager ID
How to create your new Facebook Business Manager account?
If your company does not already have a Facebook Business Manager account, you can create a new one by following the steps below.
- Go to Facebook Business Manager
- Select “Create account”
- Enter your business details and click “Submit”