This feature is very helpful in case if your user role has changed or agents are unavailable for certain reasons to assist your customer. You can deactivate the agent and assign the agent license to another agent in your team.
Edit and deactivate users in Digital Connect
This feature is very helpful in case if your user role has changed or agents are unavailable for certain reasons to assist your customer. You can deactivate the agent and assign the agent license to another agent in your team.
Keep in mind, that only admins and team supervisors can edit/deactivate users.
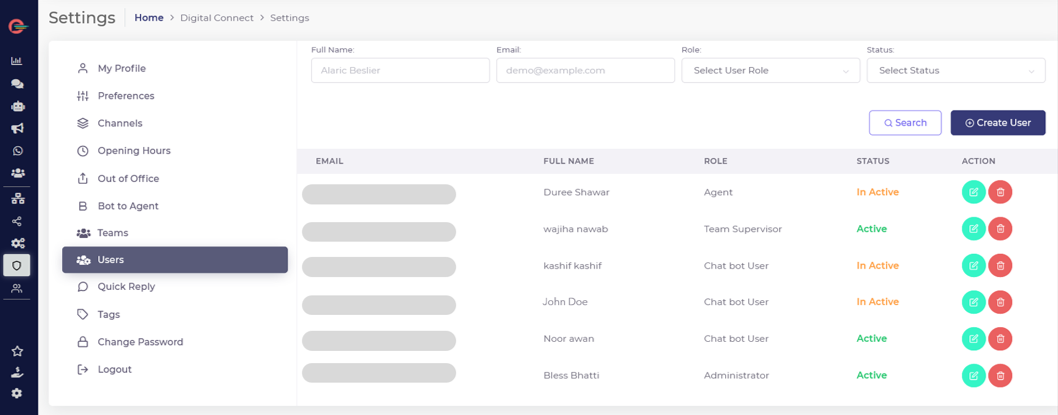
- To deactivate/edit a user, click on Users in left navigation pane. You will see a list of all Users as shown below.
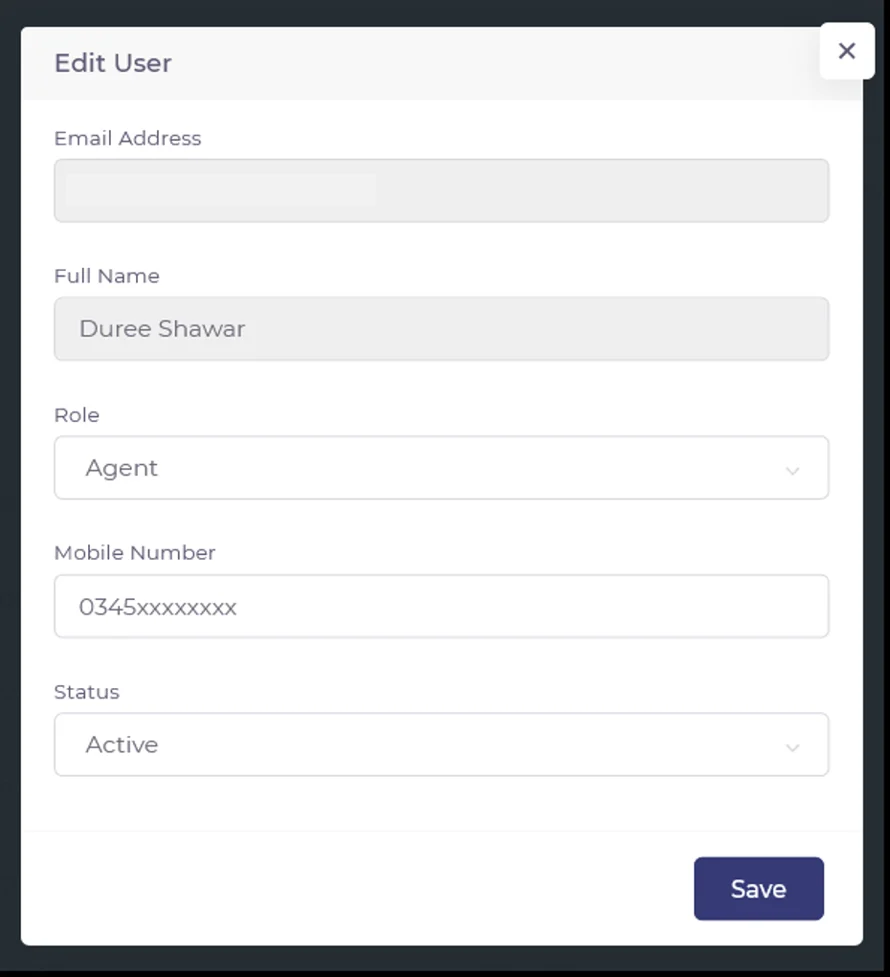
- Click on Edit (green) icon and Edit User modal will appear. Edit Mobile number and User role and select status as Active or Inactive from drop down list and click Save.

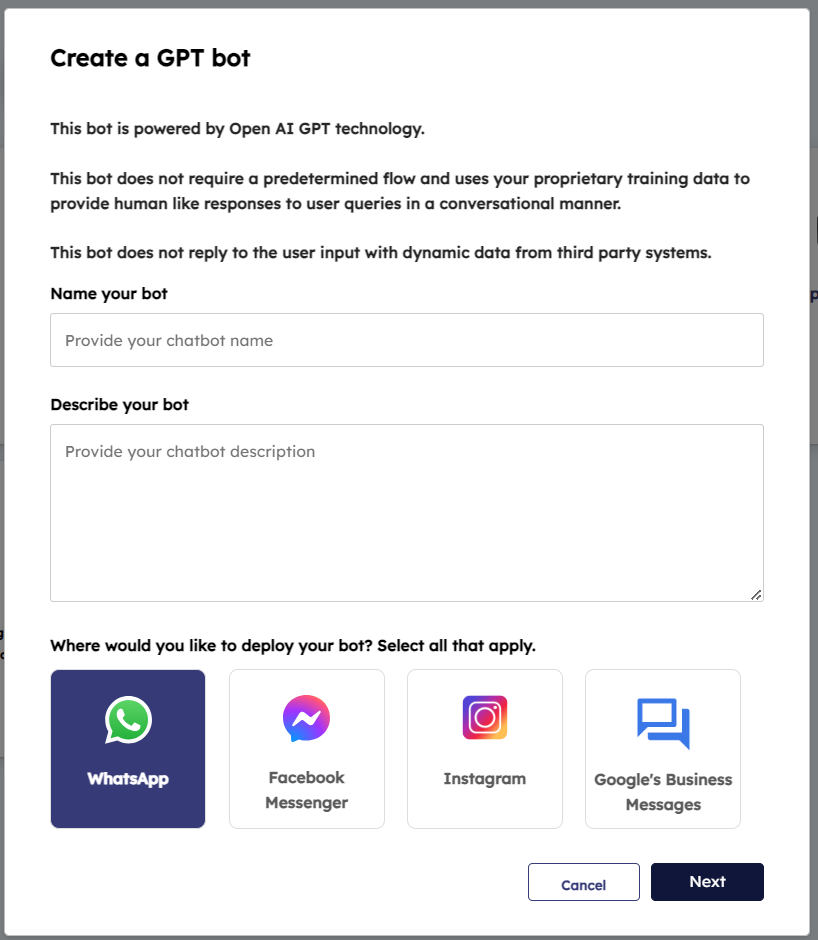
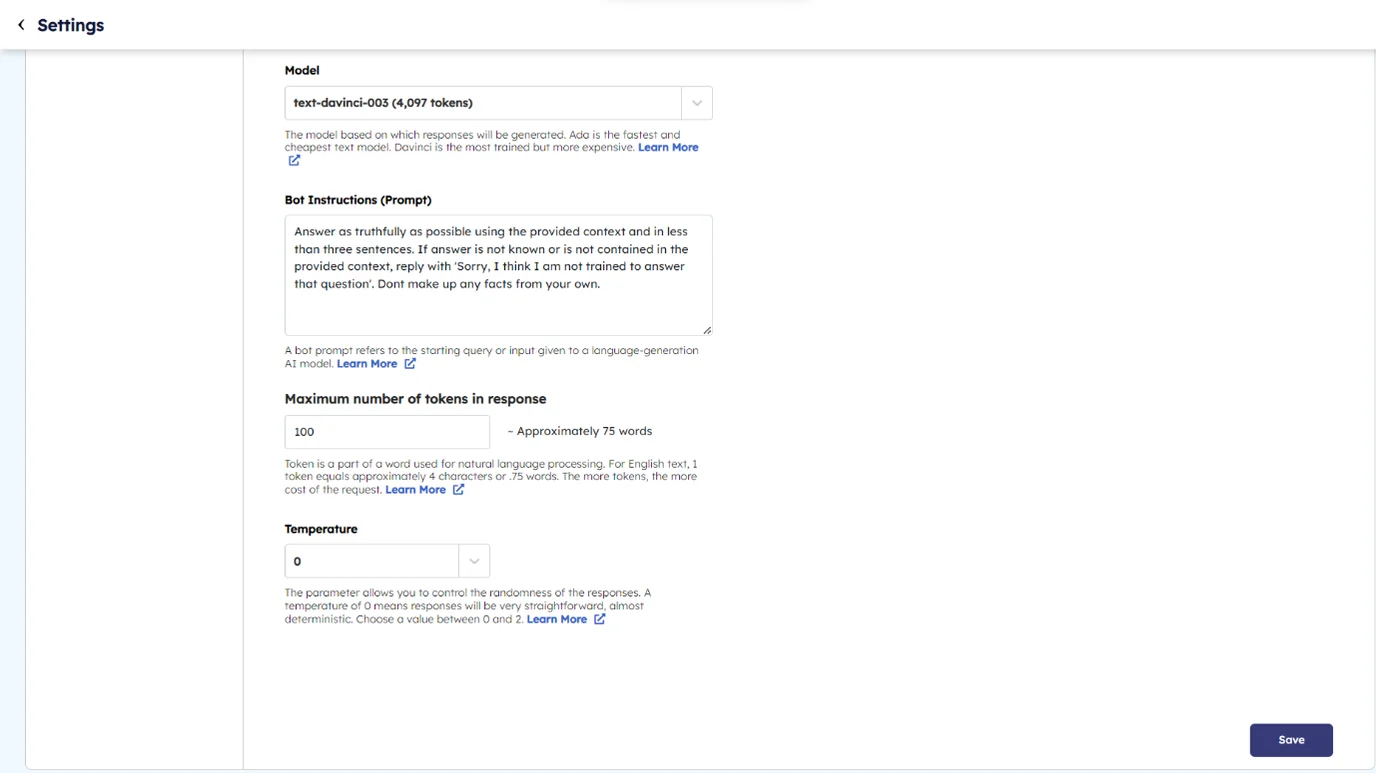
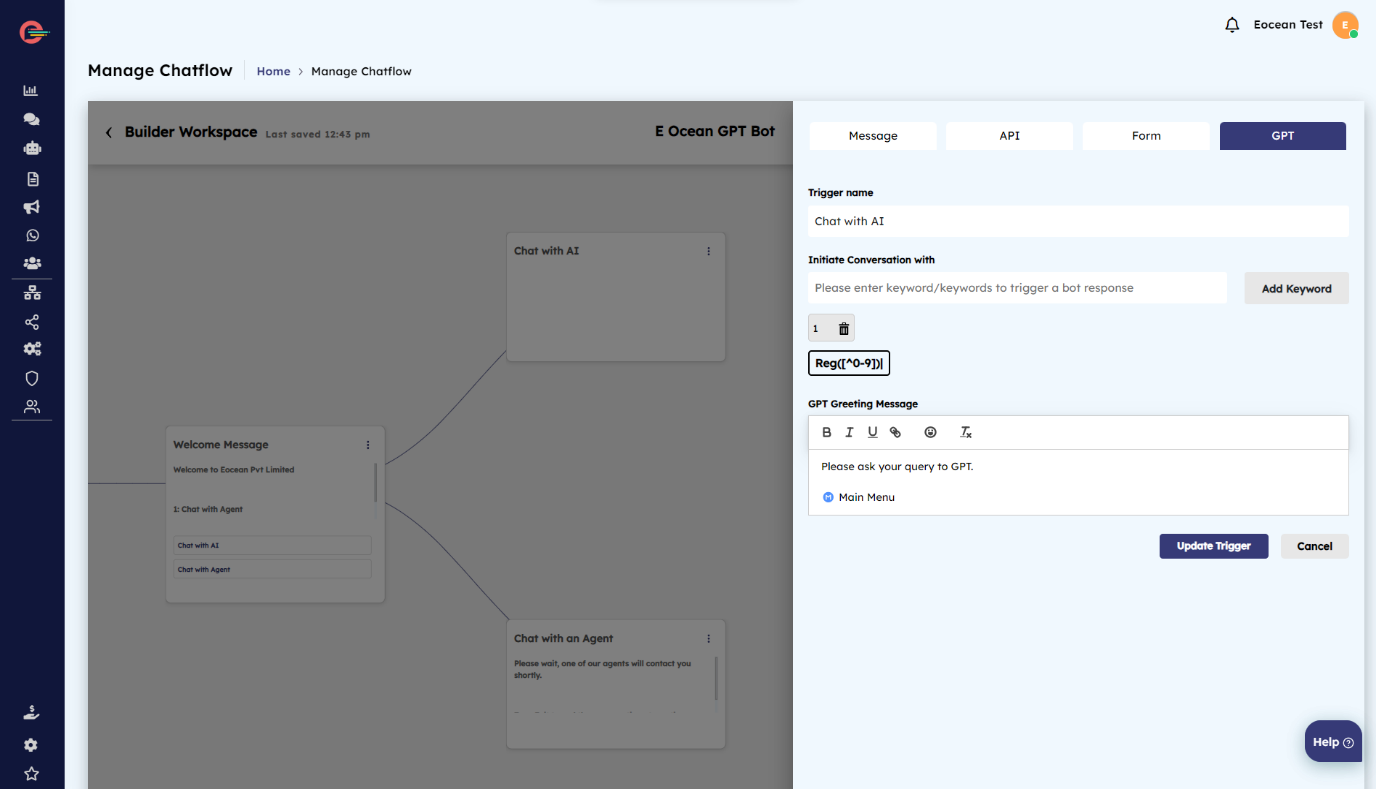 Test your Bot


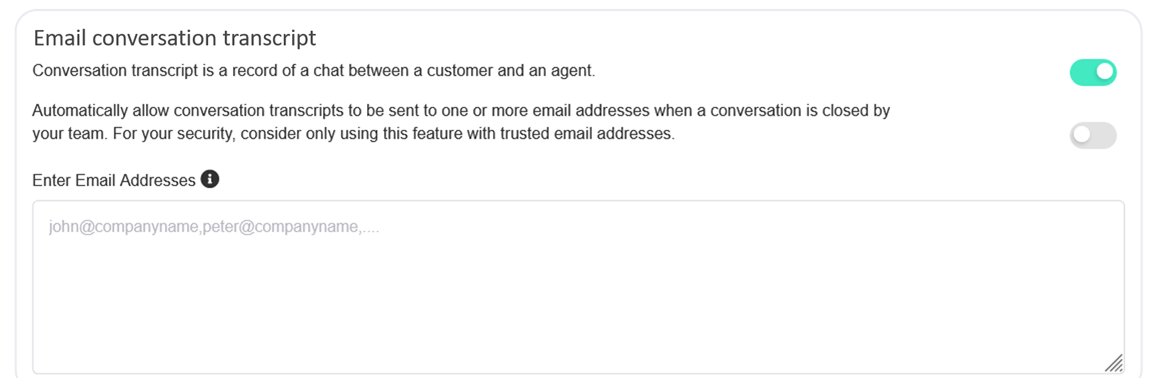
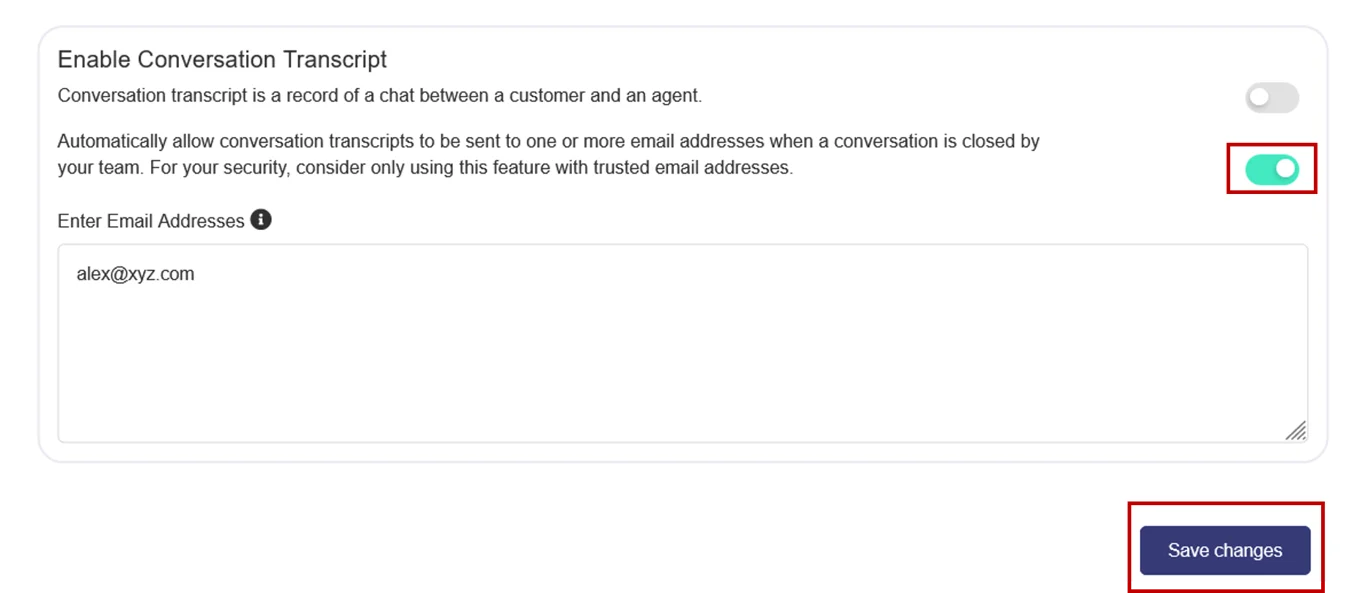 All your conversation transcripts will now be automatically emailed to your authorized email recipients once you agent marks the conversation as Closed.